
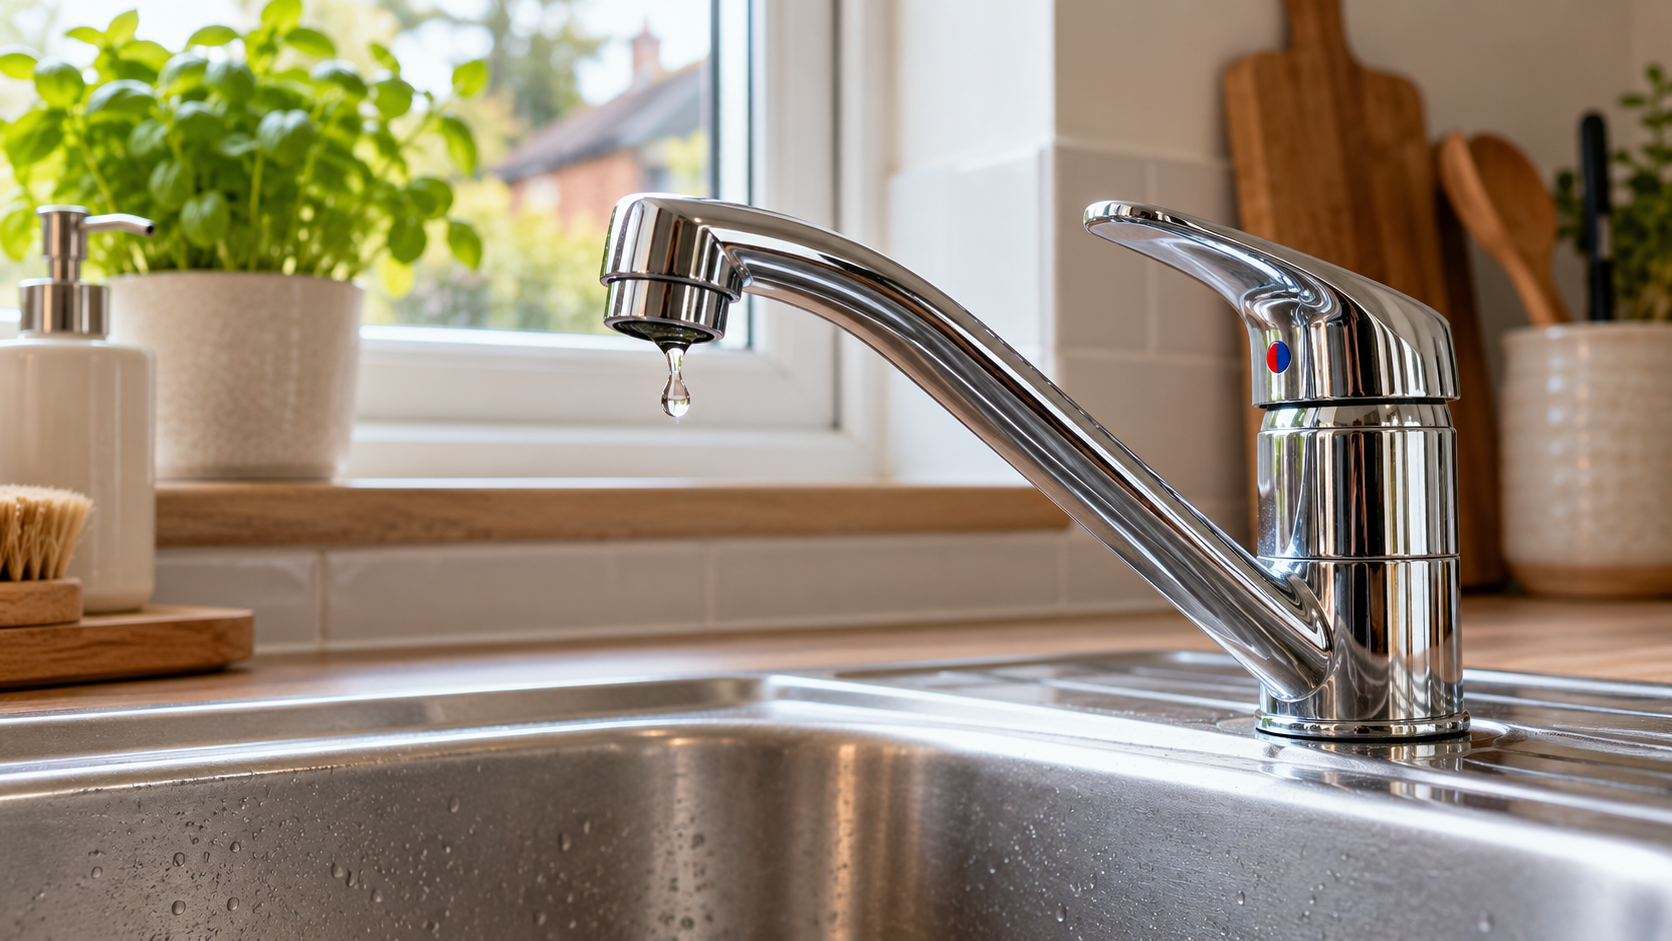
A dripping tap is one of those small household problems that can become surprisingly frustrating. Whether it’s a kitchen mixer tap or an older bathroom tap, the constant drip can waste water and make you wonder whether an expensive plumbing repair is needed.
Fortunately, some dripping taps can be repaired by replacing a relatively inexpensive component.
However, not every dripping tap needs a new washer. Traditional taps, quarter-turn taps and single-lever mixers use different mechanisms. Buying the wrong replacement part, or dismantling the tap without properly isolating the water, can turn a straightforward job into a much bigger problem.
This guide explains how to identify your tap, diagnose common leaks and understand the repair process safely.
We’ll also cover the tools you might need, typical UK costs, advice for renters and when calling a plumber is the better decision.
How Do You Fix a Dripping Tap?
The short answer: Identify the tap mechanism, safely isolate the water supply, replace the faulty washer, valve or cartridge where appropriate, then reassemble and test the tap.
| Step | What to do |
|---|---|
| 1. Identify | Check whether the tap uses a compression washer, ceramic valve or mixer cartridge |
| 2. Diagnose | Find out whether water drips from the spout or leaks elsewhere |
| 3. Isolate | Turn off the appropriate supplies and verify that water flow has stopped |
| 4. Inspect | Access the component according to the manufacturer’s instructions |
| 5. Replace | Fit an exact compatible replacement where appropriate |
| 6. Test | Restore the water gradually and check for leaks |
Safety first: Never dismantle a tap unless its water supply has been reliably isolated. If you cannot confirm this, stop and contact a plumber.
Why Is My Tap Dripping?
The cause depends on both the tap’s mechanism and the location of the leak.
Worn rubber washer
Traditional compression taps use a washer to seal against a valve seat. As the washer wears, water may continue passing through even when the handle is closed.
Faulty ceramic-disc valve
Quarter-turn taps commonly use ceramic-disc valves. Damage, wear or trapped debris can prevent the valve from sealing properly.
Worn mixer cartridge
Many single-lever taps use a cartridge to control flow and temperature. When its internal seals or components fail, water may continue dripping from the spout.
Damaged O-ring
O-rings seal certain moving parts, including swivel spouts. A damaged seal may allow water to escape around the spout base.
Limescale or debris
Mineral deposits and small particles can interfere with sealing surfaces, particularly in areas with hard water.
Leaking connection
Water appearing beneath the sink may come from a flexible hose, fitting or pipework connection rather than the tap mechanism.
Quick dripping-tap diagnosis
| Symptom | Possible cause | Recommended next step |
|---|---|---|
| Spout drips when tap is off | Washer, ceramic valve or cartridge | Identify the tap mechanism |
| Water leaks around handle | Internal seal or valve fault | Inspect the relevant assembly |
| Water leaks around swivel spout | Worn spout O-rings | Check manufacturer guidance |
| Water appears beneath sink | Hose, connection or pipework | Stop and investigate; consider a plumber |
| Tap still drips after repair | Incorrect part, debris or damaged valve seat | Recheck compatibility or seek help |
This table identifies possibilities, not guaranteed diagnoses.
If water is escaping rapidly, damaging cupboards or approaching electrical equipment, treat it as an urgent leak rather than a routine dripping-tap repair.
What Type of Tap Do You Have?
Before buying replacement parts, identify how your tap operates.
Traditional compression taps
Traditional taps commonly have separate hot and cold handles that turn several times.
A threaded valve mechanism presses a rubber washer against a seat to stop the water.
A worn washer is a common cause of dripping, although the valve seat or other components can also become damaged.
Quarter-turn ceramic-disc taps
These handles typically rotate approximately 90 degrees between open and closed.
Many use a ceramic-disc valve assembly rather than a traditional rubber compression washer.
Replacement valves vary in size, stem shape and operating direction.
Single-lever mixer taps
A single lever controls both temperature and water flow.
Many modern mixers contain a cartridge that combines the hot and cold supplies.
If the cartridge stops sealing correctly, the tap may drip even when the lever is fully closed.
Tap identification table
| Tap type | Typical handle movement | Likely repair component |
|---|---|---|
| Compression | Several complete turns | Rubber washer or valve component |
| Quarter-turn | Around 90 degrees | Ceramic-disc valve |
| Single-lever mixer | One lever controls flow and temperature | Mixer cartridge |
| Swivel-spout mixer leaking at base | Rotating spout | Spout O-rings or seals |
These are common arrangements, not universal rules.
If possible, identify the manufacturer’s name and model number. This is particularly important when purchasing replacement cartridges.
Tools and Materials You’ll Need
The exact tools depend on the tap design.
| Tool | Why it may be needed |
|---|---|
| Adjustable spanner | Removing suitable nuts or valve assemblies |
| Screwdriver set | Removing handle screws |
| Allen keys | Accessing recessed handle fixings |
| Soft cloth | Protecting chrome and other finishes |
| Small container | Keeping screws and parts together |
| Towels | Catching residual water |
| Torch | Inspecting awkward fittings |
| Correct replacement component | Repairing the identified fault |
| Manufacturer’s instructions | Confirming the correct procedure |
Some taps require a box spanner, specialist cartridge tool or other equipment.
Avoid using pliers directly against decorative chrome. The jaws can scratch the finish or damage fittings.
If you’re building confidence with home maintenance, our easy DIY jobs for beginners guide covers other manageable household tasks.
Before You Start: How to Turn Off the Water Safely
This is the most important part of the repair.
Never remove a tap valve or cartridge while the supply remains pressurised.
1. Look for local isolation valves
Many UK sinks have small isolation valves on the hot and cold supply pipes beneath the basin or kitchen sink.
They may operate using a screwdriver slot or small lever.
Only operate a valve if you can identify it and understand how it works.
Don’t force a seized valve.
2. Identify the water supplies
For a single-lever mixer tap, isolate both hot and cold supplies.
For separate hot and cold taps, the affected supply may be isolated individually if you can positively identify it.
If there are no working local valves, the isolation method depends on your plumbing system.
Combination boiler: Cold water commonly comes directly from the mains, while hot water is heated on demand. The appropriate isolation arrangements must still be confirmed.
Stored hot water: Properties with a hot-water cylinder or storage cistern may require a separate method of isolating the hot supply.
Unfamiliar systems: Don’t assume that closing the main cold-water stopcock isolates every hot-water outlet.
Never drain, dismantle or interfere with a boiler, cylinder or other heating appliance as part of a simple tap repair.
If you’re unsure how to isolate the correct supply, contact a plumber.
3. Verify that the water has stopped
After closing the appropriate valves, carefully open the tap.
A little residual water may drain from the pipework.
Wait and check that the flow stops completely.
If water continues flowing, the supply hasn’t been reliably isolated.
Do not continue.
4. Protect the sink and work area
Cover the plughole so small screws cannot fall into the drain.
Place a soft cloth in the basin and keep a towel nearby.
Ensure tools are accessible before starting.
5. Stop if anything appears unsafe
Don’t proceed if an isolation valve leaks, a fitting is seized, pipework twists when touched or you’re unsure which supply feeds the tap.
A plumber can isolate the system safely and assess the repair.
How to Fix a Traditional Dripping Tap by Replacing the Washer
A worn washer is a common cause of dripping in traditional compression taps.
The following procedure is a general guide for serviceable compression valves. Some taps dismantle differently, and not all components can be repaired individually.
Step 1: Isolate the supply
Turn off the appropriate water supply and verify that flow has stopped.
Open the tap briefly to release residual pressure.
Step 2: Protect the basin
Cover the drain and place a cloth beneath the work area.
Keep small components together.
Step 3: Remove the handle
Some handles have a decorative cap concealing a retaining screw.
Others use a visible or recessed fixing.
Remove the handle using the appropriate tool and follow the manufacturer’s instructions.
Step 4: Access the valve assembly
You may need to remove a decorative shroud.
Use a correctly sized tool to loosen the valve assembly while ensuring the tap body and connected pipework remain secure.
Don’t force seized fittings.
Step 5: Inspect the washer
On serviceable compression valves, the washer is generally located near the end of the valve assembly.
Look for flattening, cracking, distortion or other damage.
Remove it carefully if the design allows.
Step 6: Fit a compatible replacement
Match the old washer’s dimensions and type.
Don’t assume every washer in a general assortment will fit.
If the replacement doesn’t match, stop and obtain the correct part.
Step 7: Check the sealing surfaces
Look for obvious debris or visible damage to the accessible valve seat.
A badly worn or damaged seat may prevent a new washer from sealing.
Avoid scraping or modifying precision surfaces without appropriate knowledge and tools.
Step 8: Reassemble
Refit the valve assembly and handle according to the manufacturer’s instructions.
Avoid excessive force when tightening.
Step 9: Restore the water and test
Close the tap and gradually restore the supply.
Inspect around the handle and valve housing.
Operate the tap and check whether it closes normally.
Finally, watch the spout for continued dripping.
If the leak persists, don’t repeatedly force the handle closed.
How to Fix a Dripping Ceramic-Disc Tap
Quarter-turn taps commonly use replaceable ceramic-disc valve assemblies.
Unlike a traditional compression tap, the repair may involve replacing the complete valve rather than fitting a rubber washer.
General procedure
- Identify the tap manufacturer and model where possible.
- Obtain a compatible ceramic-disc valve.
- Isolate the appropriate supply and verify that water has stopped.
- Remove the handle and decorative cover following the manufacturer’s instructions.
- Carefully remove the valve assembly with the correct tool.
- Compare the original and replacement components.
- Fit the replacement and reassemble the tap.
- Restore the supply gradually and check for leaks.
Ceramic valves can differ in diameter, length, stem splines and opening direction.
Some are specifically designed for the hot or cold side.
A valve that looks similar may still be incompatible.
If you’re unable to identify the correct replacement, consult the manufacturer or a reputable plumbing supplier.
How to Fix a Dripping Single-Lever Mixer Tap
Many modern kitchen and bathroom mixer taps contain a replaceable cartridge.
A cartridge fault may cause dripping from the spout when the lever is closed.
However, not every mixer-tap leak originates from the cartridge.
Step 1: Identify the tap
Look for the manufacturer, model or installation paperwork.
The correct replacement is easier to identify when this information is available.
Step 2: Isolate both supplies
Turn off the hot and cold water supplies and confirm that water flow has stopped.
Step 3: Remove the handle
Many mixers have a concealed retaining screw beneath a small decorative cover or behind the lever.
Remove the handle carefully with the correct tool.
Step 4: Access the cartridge
The design may include a decorative shroud and retaining nut.
Follow the manufacturer’s instructions and avoid applying force that twists the tap body or supply connections.
Step 5: Match the replacement
Compare the cartridge’s diameter, height, locating tabs and seal arrangement.
Check any manufacturer’s part number.
Cartridges aren’t universally interchangeable.
Step 6: Reassemble and test
Fit the compatible cartridge as instructed.
Restore the supplies gradually, inspect for leaks and test both water flow and temperature control.
What if the mixer leaks around the spout base?
A leak around a rotating spout may involve worn O-rings rather than the main cartridge.
Water appearing underneath the sink may come from a supply connection.
Identify the location of the leak before ordering parts.
How to Choose the Correct Washer or Cartridge
Buying the correct part is often the hardest part of the job.
Before ordering, check the following:
| Detail | Why it matters |
|---|---|
| Manufacturer and model | Helps identify the correct spare part |
| Diameter | Replacement must fit the valve housing |
| Overall height or length | Incorrect dimensions can prevent assembly |
| Stem and spline shape | Handle must attach and operate correctly |
| Opening direction | Relevant to certain quarter-turn valves |
| Hot/cold handedness | Some valves are side-specific |
| Seal positions | Seals must align with the tap body |
| Locating tabs | Mixer cartridges must sit correctly |
Photograph the original part and any identifying markings.
Where possible, consult a manufacturer parts diagram or ask a plumbing supplier to confirm compatibility.
Avoid buying a generic cartridge based on appearance alone.
Why Is My Tap Still Dripping After Repair?
If the tap continues dripping after a washer or cartridge replacement, there may be another issue.
Incorrect replacement part: Even small dimensional differences can affect the seal.
Damaged valve seat: A new washer cannot always seal against a worn or pitted surface.
Debris or limescale: Contamination may prevent the mechanism from closing properly.
Damaged seals: Another O-ring or internal seal may be responsible.
Incorrect assembly: A component may not be seated or installed as intended.
A different leak source: The problem may be at the swivel spout or a connection rather than the main valve.
Don’t repeatedly dismantle the tap or tighten components with increasing force.
If the fault persists, professional assessment may be more economical than buying additional parts.
How Much Does It Cost to Fix a Dripping Tap in the UK?
Repair costs depend on the tap design, the replacement component and whether professional labour is required.
A basic washer is generally inexpensive. Ceramic valves and branded mixer cartridges may cost more.
| Repair | Cost considerations |
|---|---|
| Traditional washer replacement | Usually low-cost parts if compatible |
| Ceramic-disc valve replacement | Depends on the valve specification |
| Mixer cartridge replacement | Brand and design can affect price considerably |
| Professional tap repair | Labour, parts, location and accessibility |
| Complete tap replacement | New fitting and potentially installation labour |
Professional repair cost
As an indicative benchmark, Checkatrade’s July 2026 pricing data lists a leaking-tap repair at approximately £95–£170, with an average of £132.50.
This isn’t a fixed national price. Costs vary by region, urgency, access and the work involved.
Ask whether a plumber’s quote includes parts, VAT and call-out charges.
For an older tap with unavailable parts or extensive damage, replacing the fitting may be more economical than repeated repairs.
Source: Checkatrade — Water Supply Pipe Repair Costs.
When Should You Call a Plumber?
Some dripping taps are suitable for confident beginners. Others aren’t.
Contact a plumber if:
- You cannot reliably isolate the water.
- An isolation valve is seized, damaged or leaking.
- Water is escaping from pipework or beneath the sink.
- The tap body moves when you try to loosen a component.
- Fittings are heavily corroded.
- You cannot identify a compatible replacement.
- The leak continues after a careful repair.
- You suspect a damaged valve seat or tap body.
- You’re unfamiliar with the property’s hot-water system.
- The leak presents an electrical or significant water-damage hazard.
If a leak is rapidly escaping or causing damage, use the property’s emergency water shut-off procedure if safe and seek urgent professional assistance.
A successful DIY repair should reduce the problem, not introduce new risks.
Can You Fix a Dripping Tap in a Rented Home?
If you’re renting, report the fault to your landlord or letting agent before dismantling the tap.
In England, landlords have legal responsibilities for many plumbing and sanitary installations, including sinks, basins and associated pipework.
The exact responsibility for a repair can depend on the circumstances, including whether damage was caused by the tenant.
GOV.UK advises tenants to carry out repairs only where their tenancy agreement permits them.
A sensible approach is to:
- Photograph or record the leak.
- Report it promptly to the landlord or letting agent.
- Follow up in writing and retain a copy.
- Explain if the leak is damaging cupboards, flooring or neighbouring property.
- Obtain agreement before attempting any repair yourself.
A minor dripping tap may be less urgent than an active leak causing water damage, but both should be reported.
For more information, see GOV.UK’s guidance on private renting and repairs.
Common Mistakes When Fixing a Dripping Tap
Not isolating the water properly. Never rely on a valve position alone; verify that flow has stopped.
Assuming every tap has a washer. Many modern taps use ceramic valves or cartridges.
Buying an incompatible component. Replacement parts must match the tap’s design.
Forcing seized fittings. This can damage the tap body or connected pipework.
Scratching the chrome. Protect decorative surfaces and use suitable tools.
Over-tightening. Excessive force can damage threads and seals.
Losing small parts. Keep screws and covers together during dismantling.
Restoring water too quickly. Reopen the supply gradually and inspect for leaks.
Ignoring other signs of water damage. A leak beneath the sink or around a bath may require a different repair.
If you’re dealing with deteriorating sealant rather than a tap fault, our guide to resealing a bath explains that separate maintenance task.
Frequently Asked Questions
Can I fix a dripping tap myself?
Some dripping taps can be repaired by a confident beginner if the correct part is available and the water can be isolated safely. More complex repairs are better handled by a plumber.
Does a dripping tap always need a new washer?
No. Traditional compression taps often use washers, but quarter-turn taps and single-lever mixers commonly use ceramic valves or cartridges.
How do I know if my tap uses a ceramic cartridge?
Quarter-turn handles often indicate ceramic-disc valves, while many single-lever mixers contain cartridges. Manufacturer information is the most reliable way to confirm the mechanism.
Can I change a tap washer without turning off the water?
No. Do not dismantle a pressurised tap. Isolate the appropriate supply and verify that water has stopped before attempting a repair.
Why does my mixer tap still drip after changing the cartridge?
The replacement may be incompatible or incorrectly seated, another seal may be damaged, or debris may be preventing proper closure. A plumber can investigate persistent faults.
Are tap cartridges universal?
No. They vary in diameter, height, seals, locating features and operating mechanisms.
How much does a plumber charge to fix a dripping tap?
An indicative UK benchmark is £95–£170, but the actual price depends on the work, location and parts required. Request a clear quotation.
Is a dripping tap an emergency?
A slow drip from the spout is usually less urgent than an active leak. However, water escaping into cupboards, flooring or electrical areas may require urgent action.
Should I repair or replace an old tap?
Repair is often sensible when the correct component is available and the fitting is otherwise sound. Replacement may be better when parts are unavailable, the tap is damaged or leaks repeatedly.
Final Thoughts
A dripping tap doesn’t automatically mean you need a new fitting or an expensive plumbing repair.
Traditional compression taps may need a washer, while ceramic-disc taps and modern mixers often require a compatible valve or cartridge.
The key is to identify the tap, diagnose the leak and isolate the water safely before attempting anything.
Avoid forcing fittings, guessing replacement parts or continuing when you’re unsure about the plumbing system.
With the correct preparation, some dripping taps can be repaired relatively inexpensively. And when a repair is beyond your experience, calling a plumber early can prevent a small problem from becoming a much bigger one.