
Affiliate disclosure: This article contains affiliate links. If you buy something through one of these links, Nookcroft may earn a small commission at no extra cost to you. We only include products that are relevant to the ideas in this guide.
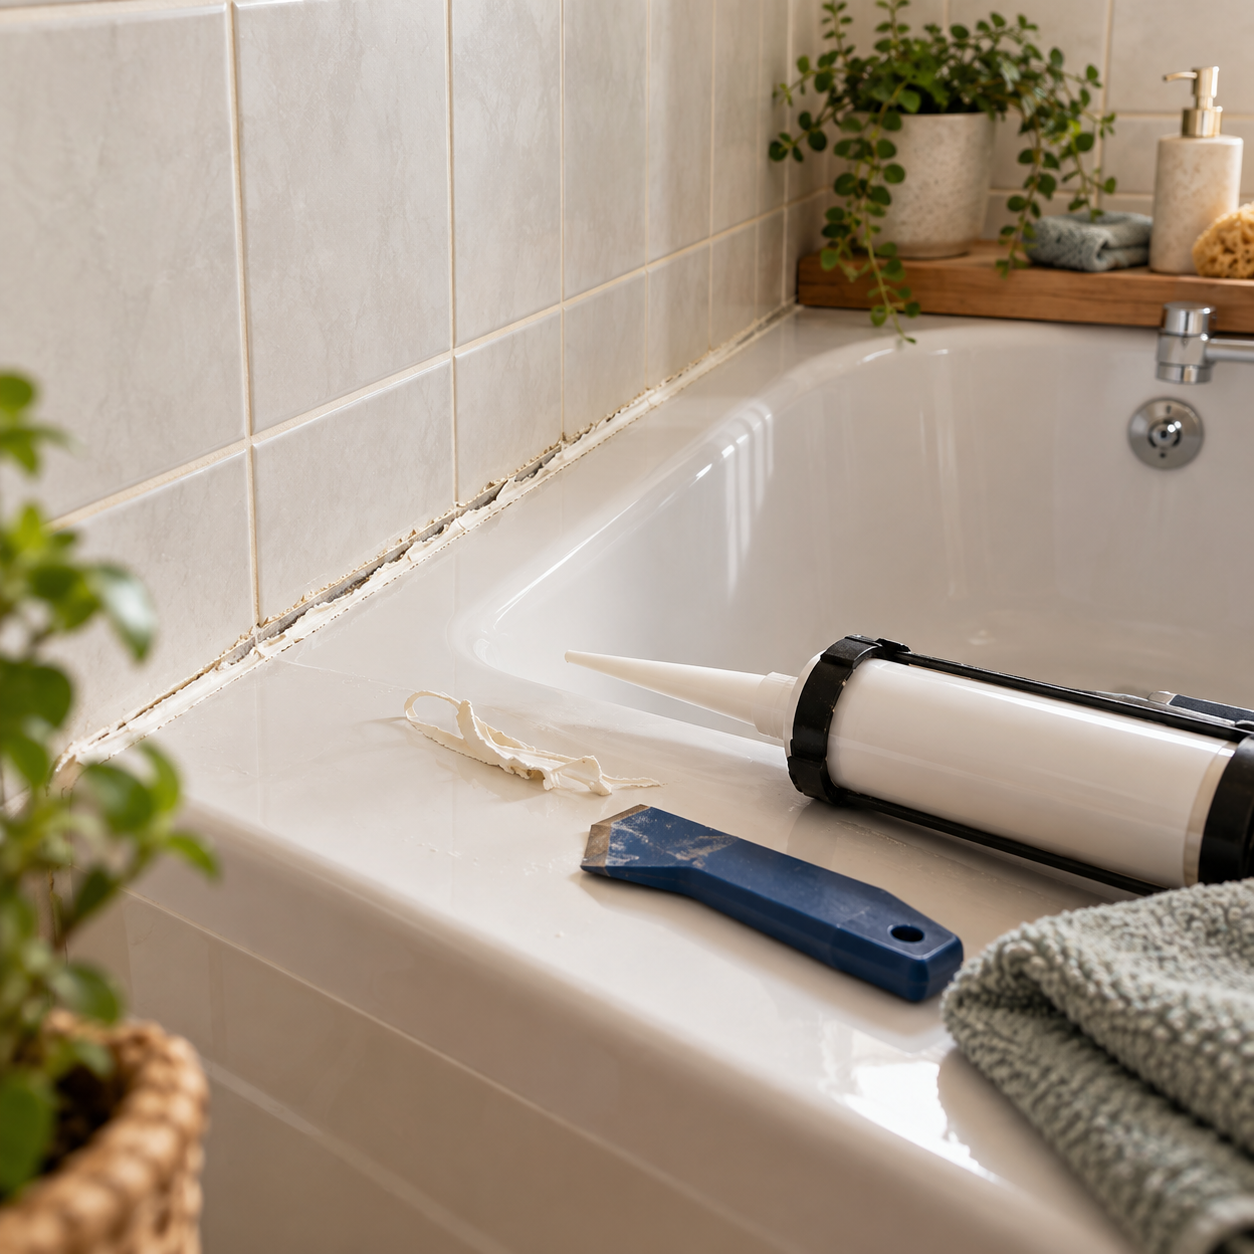
Silicone around a bath or shower doesn’t stay looking new forever.
Over time, it can become discoloured, develop mould, crack or start peeling away from the bath, shower tray or tiles. You might also notice small gaps where the silicone no longer forms a continuous seal.
When that happens, it’s tempting to put another layer over the top.
Usually, the better approach is to remove the failed silicone and start again.
Resealing a bath or shower is a manageable DIY job, but there’s more to it than squeezing a neat line from a sealant gun. In fact, the most important part happens before the new silicone goes anywhere near the joint.
Removing the old sealant properly, getting the surfaces clean and dry, and checking why the original seal failed will make a much bigger difference than trying to create a perfectly shaped bead.
Here’s how to approach the job, along with nine common mistakes worth avoiding.
Quick Answer: How Do You Reseal a Bath?
To reseal a bath or shower:
- Remove the existing silicone.
- Scrape away the remaining residue.
- Clean the joint thoroughly.
- Allow everything to dry completely.
- Check for movement, damage or signs of a larger leak.
- If you’re resealing a bath, load it with water where appropriate for the installation.
- Apply a suitable sanitary silicone in a continuous bead.
- Smooth the silicone and remove any masking tape while it’s still workable.
- Leave the sealant for the time specified by the manufacturer before exposing it to water.
The biggest mistake is rushing the preparation.
New silicone needs a clean, dry and suitable surface to bond to.
How Do You Know When Silicone Needs Replacing?
Bathroom silicone doesn’t need replacing simply because it has been there for a certain number of years.
Its condition is more important.
Consider replacing it if the silicone is:
- peeling away from the bath, tray or tiles
- cracked or split
- missing in places
- no longer bonded along one edge
- badly deteriorated
- persistently mouldy despite cleaning
- leaving gaps where water could enter the joint
A little surface mould doesn’t automatically mean the entire bead has failed.
If the silicone is still firmly bonded and otherwise in good condition, cleaning may be enough.
But once it starts separating, cracking or leaving gaps, cleaning won’t restore the seal.
Before Resealing, Work Out Why the Old Silicone Failed
Before removing anything, inspect the existing joint.
Has the silicone simply deteriorated over time?
Or is something else causing it to fail?
Press carefully around the bath or shower tray and look for obvious movement. Check the surrounding grout and tiles too.
Pay attention to:
- silicone separating repeatedly in the same place
- significant movement in the bath
- a shower tray that noticeably flexes
- cracked grout nearby
- loose tiles
- signs of water damage
- evidence of water escaping somewhere else
Silicone is flexible, but it can’t compensate indefinitely for an unstable bath or shower tray.
If something is moving significantly, investigate that first.
Likewise, if water has already caused visible damage elsewhere, don’t assume replacing the silicone will automatically solve the whole problem.
The goal is to repair a failed seal—not hide evidence of a larger issue.
What You’ll Need
Depending on the job, you may need:
- sanitary bathroom silicone
- a sealant gun
- silicone-removal tool or scraper
- an appropriate scraper or blade for stubborn residue
- cleaning cloths or paper towels
- a cleaner suitable for the surfaces and silicone you’re using
- masking tape
- silicone smoothing tool
- protective gloves
Have everything nearby before you begin applying the new silicone.
Once the bead is down, you don’t want to go searching for the smoothing tool.
What Type of Silicone Should You Use Around a Bath or Shower?
Choose a silicone specifically suitable for sanitary applications, bathrooms or wet areas and compatible with the surfaces you’re sealing.
Sanitary silicones are designed for areas regularly exposed to moisture and commonly provide a flexible, water-resistant or waterproof seal with mould-resistant properties.
Don’t use ordinary decorator’s caulk simply because it’s easy to apply.
The joint between a bath or shower and the surrounding surface needs to cope with water and a degree of movement.
Before starting, read the instructions for the actual silicone you’ve bought.
Pay particular attention to:
- compatible surfaces
- surface preparation
- application instructions
- working or tooling time
- curing time
- when the seal can be exposed to water
Products vary, so the manufacturer’s instructions should take priority over generic DIY advice.
A useful option: Soudal Stay Fresh Anti Mould Sanitary Silicone
If you’re replacing the seal around a bath or shower, a dedicated sanitary silicone is the type of product to look for. Soudal Stay Fresh is designed for sanitary applications and includes anti-mould protection, making it suitable for wet areas such as bathrooms.
Check that the colour and product specifications are suitable for your particular bath, tiles and joint before buying.
Step 1: Remove the Old Silicone
This is often the slowest part of the entire job.
Carefully separate the existing silicone from the surfaces along both edges.
Once enough of the bead has been loosened, you may be able to peel longer sections away.
Sometimes it comes off cleanly.
Sometimes it doesn’t.
A silicone-removal tool can make the process easier, particularly around corners.
If you use a blade or scraper, be careful not to scratch tiles, damage an acrylic bath or cut into softer surfaces.
Use tools appropriate for the materials you’re working around.
Don’t stop when the main strip comes off
Removing the visible bead is only the beginning.
Thin silicone residue can remain attached to the bath, tray or tiles even after the main strip has been removed.
Inspect the surfaces closely and remove the remaining residue using a method suitable for those surfaces.
This preparation matters because the new silicone needs to bond to the joint itself rather than a layer of old material.
A useful option: 3-in-1 Silicone Caulking Tool, Sealant Remover & Finishing Tool for Home
A dedicated silicone tool can make two of the trickier parts of the job easier: removing the old sealant without relying entirely on a blade, and shaping the replacement bead once it’s applied.
For someone resealing a bath for the first time, a simple removal and smoothing set can be more manageable than improvising with whatever tools happen to be available.
Step 2: Clean the Joint Thoroughly
Once the old silicone and residue are gone, clean the area according to the preparation instructions for your new sealant.
You want to remove anything that could interfere with adhesion, including:
- dirt
- soap residue
- grease
- old silicone
- cleaning-product residue
If there’s mould around or beneath the old sealant, deal with it during this stage rather than immediately covering it with new silicone.
Be particularly careful when choosing cleaners around acrylic baths, natural stone or other surfaces that may be sensitive to certain products.
When in doubt, follow the recommendations for both the surface and the silicone you’re using.
Step 3: Let the Joint Dry Completely
Don’t rush from cleaning straight into sealing.
Silicone manufacturers commonly require the surfaces to be clean and dry before application.
That means more than wiping away visible droplets.
Corners, grout lines and narrow gaps can hold moisture after the surrounding surfaces appear dry.
Give the area enough time to dry properly and keep the bath or shower out of use while you’re preparing it.
Ventilation can help remove moisture from the room.
If excess moisture is a wider problem around your home, our guide to how to stop condensation on windows explains practical ways to reduce moisture and improve ventilation.
Once the joint is clean, dry and free from old silicone residue, you’re ready to prepare for the new seal.
Step 4: Fill the Bath Before Sealing Where Appropriate
Baths can move slightly when they’re carrying the weight of water and a person.
That’s why filling a bath with water before applying silicone is commonly recommended when resealing the joint between the bath and wall.
The additional weight puts the bath closer to the position it occupies during normal use.
If the joint is sealed with the bath completely unloaded and the bath subsequently moves when filled, the silicone may have to accommodate additional movement.
Follow the guidance appropriate to your bath and installation, and keep the bath loaded for the period recommended by the relevant installation or sealant instructions.
What about a shower tray?
Don’t assume the same technique applies.
Instead, check whether the tray feels properly supported.
If it noticeably flexes under normal weight, investigate the cause before relying on a new bead of silicone to compensate for it.
A sealant can accommodate normal joint movement.
It shouldn’t be expected to solve an inadequately supported installation.
Step 5: Apply Masking Tape if You Want a Neater Edge
Masking tape isn’t essential.
But it can make the job easier for a beginner.
Apply tape along both sides of the joint, leaving the width you want the finished silicone bead to cover.
This creates a cleaner boundary and limits how far excess silicone spreads across the surrounding surfaces.
Make sure the area is dry before applying the tape.
And remember: the tape needs to come off while the silicone is still workable.
A simple option: No Nonsense Sealant Gun
If your silicone comes in a standard cartridge, you’ll need a sealant gun to apply it. You don’t need an expensive professional model for an occasional bathroom resealing job—a straightforward manual gun gives you controlled pressure while applying the bead.
It’s also a useful basic tool to keep if you expect to tackle other sealing jobs around the home.
Step 6: Prepare the Silicone
Fit the cartridge into the sealant gun.
Prepare the nozzle according to the manufacturer’s instructions and cut the opening to suit the joint.
Don’t automatically cut a huge opening.
A large nozzle produces a large amount of silicone, which quickly becomes difficult to control.
Starting with an opening appropriate for the joint makes it easier to apply a manageable bead.
Have your smoothing tool and waste cloths ready before you begin.
Step 7: Apply a Steady, Continuous Bead
Position the nozzle so the silicone fills the joint rather than merely sitting as a decorative line across the surface.
Apply consistent pressure to the gun and move along the joint at a steady pace.
Try to avoid constantly stopping and restarting.
The bead doesn’t have to look perfect straight from the nozzle.
What matters at this stage is getting a continuous amount of silicone into the joint with good contact on both sides.
Corners can be more difficult, so work methodically rather than rushing.
Step 8: Smooth the Silicone
Use a suitable silicone-finishing tool and follow the product’s tooling instructions.
Smooth the bead so it forms a continuous seal along the joint.
Aim for a controlled pass rather than repeatedly working the same area.
Silicone begins forming a skin after application, and endlessly going back over it can make the finish worse.
Once the bead is neat and continuous, leave it alone.
A perfectly shaped showroom finish isn’t the goal.
A properly bonded, continuous seal is.
Remove the masking tape
If you’ve used tape, carefully remove it while the silicone is still workable.
Don’t leave it until the sealant has cured around the edge.
After removing the tape, resist the temptation to keep adjusting the bead unless there’s a genuine problem that needs correcting.
Step 9: Allow the Silicone to Cure
This is where patience matters again.
Don’t assume every bathroom silicone needs exactly 24 hours before the bath or shower can be used.
Products vary considerably.
Some modern sanitary silicones are designed for relatively fast return to service, while others need longer.
Check the manufacturer’s instructions for:
- tooling time
- skin formation
- curing
- shower-ready or water-exposure time
Those aren’t necessarily the same thing.
Keep the new joint dry for the required period.
If you’ve filled the bath before sealing, follow the appropriate guidance for when it should be drained.
You’ve already done the difficult part.
Don’t compromise the job by using the bath or shower too soon.
9 Mistakes to Avoid When Resealing a Bath or Shower
The basic process isn’t particularly complicated.
Most disappointing results come from shortcuts.
Mistake 1: Putting New Silicone Over Failed Silicone
Covering an old bead might make the joint look better temporarily, but it doesn’t address what’s underneath.
If the existing silicone is peeling, contaminated or poorly bonded, another layer doesn’t restore the original joint.
For a proper reseal, remove the failed silicone and prepare the surfaces underneath.
Mistake 2: Leaving Silicone Residue Behind
Pulling off the main bead isn’t enough.
Thin residue can remain on both sides of the joint.
Take the time to remove it using a method that’s safe for the bath, tray and surrounding surfaces.
Preparation is where much of the quality of the finished job is determined.
Mistake 3: Applying Silicone to a Damp or Dirty Surface
This is one of the easiest ways to undermine the new seal.
The surfaces should meet the sealant manufacturer’s preparation requirements—typically clean, dry and free from contaminants such as dirt and grease.
Don’t rush this stage simply because applying the silicone feels like the “real” job.
Mistake 4: Using the Wrong Sealant
Not everything supplied in a cartridge is suitable for a bath or shower.
Use a sanitary silicone intended for wet areas and compatible with the surfaces you’re sealing.
Ordinary decorator’s caulk isn’t a substitute for a flexible bathroom silicone joint.
Mistake 5: Ignoring Movement
A new silicone bead can’t fix an unstable bath or poorly supported shower tray.
Normal movement is one reason flexibility matters, but significant movement deserves investigation.
If the same section repeatedly separates, ask why before resealing it for the third or fourth time.
Mistake 6: Cutting the Nozzle Too Large
Too much silicone makes the bead harder to control and creates unnecessary mess.
Prepare the nozzle to suit the joint rather than assuming more silicone means a better seal.
You want enough material to form a continuous joint—not half a cartridge sitting on the surface.
Mistake 7: Overworking the Bead
Apply the silicone, tool it properly and then leave it alone.
Repeatedly returning to tiny imperfections becomes harder as the surface starts to skin.
A neat, continuous and well-bonded bead is more important than chasing absolute cosmetic perfection.
Mistake 8: Leaving Masking Tape on Too Long
Masking tape can help create clean edges, but don’t allow the silicone to cure around it.
Remove the tape while the sealant is still workable.
Otherwise you risk disturbing or tearing the edge you’ve just created.
Mistake 9: Using the Bath or Shower Too Soon
The bead may look finished long before the silicone has reached the point where it should be exposed to water.
Follow the product instructions.
Don’t rely on a generic “wait 24 hours” rule when your particular silicone gives different guidance.
Why Does My Bath Silicone Keep Coming Away?
If the same joint keeps failing, stop treating the silicone as the only possible problem.
Possible causes include:
- poor surface preparation
- silicone residue left behind
- moisture during application
- an unsuitable product
- excessive movement
- inadequate support beneath the bath or shower tray
- water entering the area from somewhere else
- a joint that’s difficult for the chosen sealant to accommodate
Look closely at where the failure occurs.
Does the silicone separate from the bath but remain attached to the tile?
Does one corner always open up?
Does the gap appear when the bath is filled?
Does the tray move underfoot?
Those observations can help distinguish an adhesion problem from a movement problem.
Repeatedly stripping and resealing the same joint without identifying the cause can become an endless cycle.
What If There’s Mould Under the Silicone?
If mould is visible after removing the old bead, don’t immediately cover it again.
Clean the area appropriately and allow it to dry thoroughly before resealing.
Also think about the conditions in the room.
Bathrooms naturally produce a lot of moisture, so use available extraction and ventilation to help remove it.
Mould-resistant sanitary silicone can help resist growth on the seal itself, but it doesn’t replace good moisture management.
What If Water Has Already Got Behind the Bath or Shower?
This is where the job may stop being a simple reseal.
If you’ve found one small failed section and the surrounding area remains sound and dry, replacing the silicone may be all that’s needed.
But investigate further if you notice:
- damp staining
- swollen or deteriorating materials
- loose tiles
- damaged plaster
- persistent musty smells
- water appearing in another room
- staining on the ceiling below
- continued leakage after resealing
A new bead of silicone shouldn’t be used to hide evidence of water damage.
If water is getting somewhere it shouldn’t, finding the source matters more than making the joint look tidy.
Can You Reseal Only Part of a Bath?
Sometimes, but consider the condition of the entire run.
Joining new silicone neatly and reliably to an older bead can be awkward.
If a substantial section is already deteriorating, replacing the whole affected run can give a more consistent result.
If the existing seal is otherwise sound and only a small section has been accidentally damaged, a local repair may sometimes be reasonable.
Use the condition of the existing silicone—not simply the size of the visible gap—to decide.
Silicone or Grout Around a Bath?
Grout and silicone perform different jobs.
Grout is normally used between tiles.
Flexible silicone is commonly used at changes of plane and where the tiled surface meets fixtures such as baths and shower trays, where some movement may occur.
If a joint was designed to use flexible silicone, replacing it with ordinary grout isn’t necessarily an equivalent repair.
Likewise, spreading silicone across sound grout isn’t a substitute for identifying where the actual water-resistant joint needs to be.
Is Resealing a Bath a Good Beginner DIY Job?
For many people, yes.
It doesn’t require a huge collection of tools, and the process is relatively easy to understand.
The challenge is patience.
Don’t rush the removal.
Don’t rush the cleaning.
Don’t rush the drying.
And don’t rush the curing.
If you’re gradually becoming more confident tackling smaller maintenance jobs, our guide to 11 easy DIY jobs that make a home feel better without a renovation has more manageable projects that can improve how your home looks and works.
When Should You Call Someone Instead?
Consider getting appropriate professional help if:
- the bath moves significantly
- the shower tray flexes excessively
- tiles are loose
- there’s substantial water damage
- the same joint repeatedly fails
- you suspect a hidden leak
- flooring or walls around the area are deteriorating
- water is appearing elsewhere in the property
- you’re unsure whether the silicone is actually the source of the problem
Resealing can solve a failed joint.
It can’t repair every bathroom leak.
A Simple Bath and Shower Resealing Checklist
Before considering the job finished, check:
Old silicone removed?
Remaining residue removed?
Joint cleaned according to the product requirements?
Area completely dry?
No obvious movement, leak or damage that needs investigating first?
Suitable sanitary silicone chosen?
Bath loaded where appropriate?
Nozzle prepared to suit the joint?
Continuous bead applied?
Silicone tooled within its working time?
Masking tape removed while the silicone was workable?
Manufacturer’s water-exposure or curing instructions checked?
If the answer to all of those is yes, you’ve given the replacement seal a much better chance of doing its job properly.
Frequently Asked Questions
How often should you reseal a bath?
There’s no universal replacement schedule.
Pay attention to the condition of the silicone. Cracking, separation, missing sections and deterioration that can’t be resolved through cleaning are more useful indicators than age alone.
Can you put new silicone over old silicone?
For a failed bath or shower joint, removing the old silicone and preparing the underlying surfaces generally gives you a better basis for the replacement seal.
Should you fill a bath before resealing it?
Loading a bath with water before sealing is commonly recommended because it accounts for some of the movement that occurs when the bath is in use.
Follow the guidance appropriate to your particular bath, installation and sealant.
How long after sealing can you use the shower?
Follow the instructions for the silicone you’re using.
Products differ, and the time until a seal is ready for water exposure isn’t necessarily the same as its full curing time.
What sealant should you use around a bath?
Use a sanitary silicone suitable for bathroom or wet-area applications and compatible with the bath, tiles and other surfaces involved.
Why has my bath sealant cracked?
Possible causes include movement, poor preparation, deterioration, unsuitable sealant or a problem with the bath or surrounding joint.
Repeated failure in the same place is a reason to investigate rather than simply reseal again.
Should you use silicone or caulk around a bath?
For a flexible, water-resistant joint between a bath and surrounding tiled surface, a suitable sanitary silicone is normally the appropriate type of product rather than ordinary decorator’s caulk.
The Bottom Line
Resealing a bath or shower isn’t really about how quickly you can use a sealant gun.
It’s about preparation.
Remove the failed silicone.
Remove the residue underneath it.
Clean the joint.
Let it dry properly.
Check for excessive movement or signs of a larger problem.
Then apply a suitable sanitary silicone carefully and give it the time specified by the manufacturer before getting it wet.
The new bead may take only a few minutes to apply.
Everything you do beforehand is what gives it the best chance of lasting.
And if the same joint keeps failing, don’t simply keep replacing the silicone.
Find out why it’s failing first.